How to Sew on a Button by Hand: A Beginner’s Guide
Small clothing repairs are easier to handle when you understand a few basic hand-sewing techniques. Learning how to sew on a button helps you replace loose or missing buttons neatl...
Quincy D.-Aug 01, 2026
Image by Unsplash
Table of Contents
Small clothing repairs are easier to handle when you understand a few basic hand-sewing techniques. Learning how to sew on a button helps you replace loose or missing buttons neatly, strengthen the attachment, and extend the life of shirts, jackets, pants, or other garments.
With the right needle, thread, placement, and stitching method, beginners can complete the repair confidently without relying on a sewing machine.
1. Different Buttons Need Different Sewing Techniques
Button construction affects how the thread should pass through the fabric and how much flexibility the finished attachment needs. Choosing the right sewing method helps the button sit properly, withstand repeated use, and avoid unnecessary strain on the garment.
Two-Hole vs. Four-Hole Flat Buttons
Flat buttons sit directly against the fabric and are secured by stitching through visible holes. When learning how to sew on a button, two-hole buttons usually need repeated stitches through the same pair of holes, while four-hole buttons can be sewn with parallel lines or a crossed pattern that matches the original garment design.
Keep the thread firm without pulling the button too tightly against the fabric, especially on thicker materials. Leaving a small amount of space can make fastening easier and reduce strain. Finish with several secure stitches on the back so the button remains stable during regular wear.
Shank Buttons
Shank buttons have a small loop or stem on the back instead of visible holes through the face. This raised construction creates extra space between the button and fabric, making shank buttons especially useful on coats, jackets, and other garments made from thicker materials.
Pass the needle repeatedly through the shank and fabric while keeping the button aligned with its original position. Avoid pulling the thread excessively tight, since the shank should remain slightly raised. Secure the thread firmly on the reverse side to help the button withstand repeated fastening and movement.
Hand sewing works well for most everyday button repairs, but the best method depends on the garment fabric, button style, and how much stress the closure receives. Understanding how to sew a button back on properly helps create a neater repair while reducing the chance that the button loosens again after a few wears.
How to Sew a Button on Pants
Pants buttons usually handle more tension than shirt buttons, especially around the waistband. Strong thread, accurate placement, and secure finishing stitches are important for keeping the button firmly attached.
Mark the original position so the waistband closes comfortably without pulling.
Thread the needle with durable thread and tie a secure knot at the end.
Push the needle from the inside of the waistband through the fabric and button hole or shank.
Repeat the stitches several times, keeping the button stable without pulling it completely flat.
Wrap the thread beneath a flat button if extra spacing is needed, then knot the thread securely on the inside.
How to Sew a Button on a Shirt
Shirt buttons are usually lighter and require a clean attachment that allows the fabric to move naturally. Matching the existing stitch pattern also helps the repaired button blend with the rest of the garment.
Align the replacement button with the original stitch marks and nearby buttons.
Bring the threaded needle up from the back of the fabric through the first button hole.
Sew through two-hole buttons repeatedly, or follow the existing parallel or crossed pattern on four-hole buttons.
Maintain even tension so the button stays secure without puckering the shirt fabric.
Finish with several small stitches on the reverse side, tie a firm knot, and trim the excess thread.
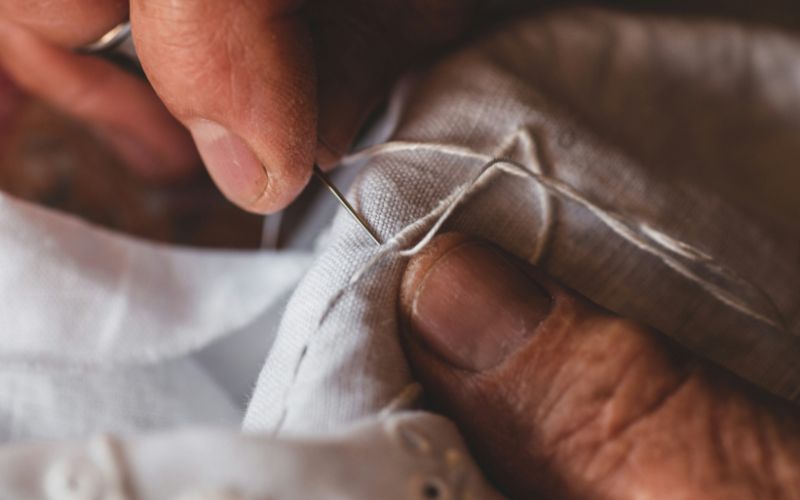
Learn how to sew a button back on securely for a neat repair that lasts through everyday wear. (Image by Unsplash)
How to Sew a Button on Heavy Coats and Jackets
Coats and jackets often use thicker fabric, larger buttons, or shank designs that need extra strength and space for fastening. A heavier needle and strong thread can make the repair more durable and easier to manage.
Position the button carefully and confirm that it lines up with the buttonhole before sewing.
Use sturdy thread and make several passes through the fabric and buttonholes or shank.
Leave enough space beneath a flat button to accommodate the thickness of the coat when fastened.
Create a thread shank by wrapping thread beneath the button when the design requires additional closure.
Reinforce the attachment from the reverse side with secure stitches and a firm knot before trimming the thread.
3. Pro Tips for Making Hand-Sewn Buttons Stay On Longer
Durability depends on more than simply passing a thread through the button several times. Small choices involving thread strength, tension, placement, and finishing technique can help a repaired button withstand everyday pulling, washing, and repeated fastening.
Choose a strong thread: Use polyester or another durable thread suited to the garment fabric. Heavier coats and pants may need thicker thread than lightweight shirts.
Double the thread when needed: Sewing with doubled thread adds strength while reducing the number of passes required to create a secure attachment.
Keep tension balanced: Pull the thread firmly enough to hold the button in place, but avoid tightening it so much that the fabric puckers or the button cannot move naturally.
Reinforce the attachment: When learning how to sew on a button, make several consistent passes through each hole or shank before finishing to create a stronger connection.
Create space for thick fabrics: Flat buttons on coats or heavy garments often need a small thread shank beneath them so the fabric can fit comfortably when buttoned.
Secure the final knot carefully: Finish on the reverse side of the garment with a firm knot close to the fabric, then trim excess thread without cutting too near the knot.
Inspect buttons before they loosen completely: Tightening a button when the stitches first begin to weaken is easier than replacing it after the thread breaks or the button gets lost.
4. Helpful DIY Guides Are Easier to Access on the Go
Repair tutorials are easier to use when you can access them wherever a problem happens. The Lifeline Program helps eligible low-income consumers reduce the cost of qualifying phone or internet service. This makes it easier to browse guides or watch repair videos on the go, with one non-transferable benefit available per eligible household.
Eligibility generally follows two paths. Households may qualify when income is at or below 135% of the Federal Poverty Guidelines, while participation in programs such as SNAP, Medicaid, SSI, Federal Public Housing Assistance, Veterans Pension or Survivors Benefit, or certain Tribal programs may also qualify. For example, a household receiving SNAP can use that participation as a program-based eligibility route.
TAG Mobile is an eligible telecommunications carrier offering Lifeline-supported wireless service for qualifying customers. Its combination of service options and device choices can help users handle everyday digital tasks such as viewing DIY videos, reading repair instructions, taking reference photos, or staying in touch while away from home.
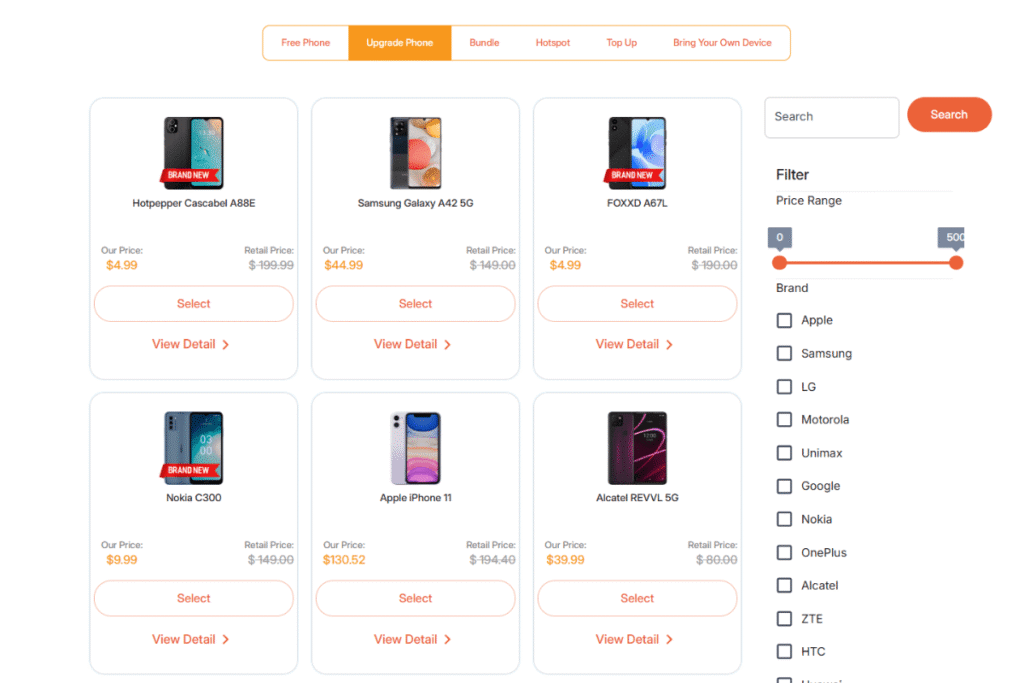
TAG Mobile currently lists the following models, although availability can depend on ZIP code, eligibility, and inventory.
Apple iPhone 8: Familiar iOS functionality makes this model useful for browsing sewing tutorials, saving reference images, watching demonstrations, and handling everyday calls or messages.
Samsung Galaxy A20: Its spacious display can make visual DIY guides, step-by-step instructions, and reference photos easier to follow during small clothing repairs.
Samsung Galaxy S21 5G: Strong smartphone performance supports video tutorials, web browsing, photography, and other digital tasks that can be helpful when learning practical skills on the go.
Samsung Galaxy Tab A 2018: Extra screen space makes diagrams, instructional videos, and longer repair guides easier to view while working through each step.
Samsung Galaxy A23 5G: 5G capability and a larger display provide a convenient setup for accessing online guides, streaming demonstrations, taking progress photos, and managing daily communication.
Device selection and Lifeline service availability vary by location and eligibility, so customers should review the options available for their ZIP code before applying.
List of tablets and upgraded phones at TAG Mobile (Offers may vary by state, inventory, and time of your application).
Note: Eligibility varies by state and program. Offers depend on availability and qualifications. TAG Mobile operates under the federal Lifeline Program as an Eligible Telecommunications Carrier (ETC). Service is non-transferable and limited to one service per household.
5. Frequently Asked Questions About Sewing Buttons
Small details such as stitch count, spacing, and button construction can make a noticeable difference in how secure and comfortable a repair feels. Knowing these basics also makes how to sew on a button easier to apply across shirts, pants, coats, and other garments.
How many stitches should hold a button?
There is no single required number, but several passes through each hole or shank are usually enough to create a secure attachment. The exact amount depends on thread strength, fabric thickness, button size, and how much tension the closure receives during wear.
Should you leave space under the button?
Yes, some space is helpful, especially on thicker fabrics. Leaving a small gap allows the fabric to fit comfortably beneath the button when fastened, while coats and jackets may need a more noticeable thread shank for extra clearance.
What’s the difference between a two-hole and four-hole button?
Two-hole buttons are attached by stitching repeatedly through one pair of holes, making the process simple and quick. Four-hole buttons offer more stitching patterns, such as parallel or crossed lines, and can provide additional stability when sewn evenly and secured properly.
Final Thoughts
Simple clothing repairs become much easier once you know the right thread tension, stitch pattern, and spacing for different button styles. Learning how to sew on a button can help extend the life of shirts, pants, coats, and other garments while avoiding unnecessary replacement costs.
Keeping helpful tutorials within reach can also make everyday DIY tasks more manageable, and eligible consumers can explore Lifeline-supported wireless service and device options through TAG Mobile.
Share
TAG Blog
Stories, guides, and helpful updates for staying connected.