How to Check Oil Level in Car and Read the Result Correctly
Regular oil checks help detect low levels, contamination, and potential leaks before they cause serious engine problems. Learning how to check oil level in car involves choosing th...
Quincy D.-Aug 05, 2026
Image by Unsplash
Table of Contents
Regular oil checks help detect low levels, contamination, and potential leaks before they cause serious engine problems. Learning how to check oil level in car involves choosing the right time, using the dipstick properly, and interpreting the oil’s level, color, and texture.
This guide explains each step clearly, helping you assess the result accurately and keep your engine running smoothly.
1. Why Checking the Oil Level Matters Before a Warning Appears
Dashboard warning lights often appear only after oil pressure has already dropped to an unsafe level. Regular inspections help uncover gradual oil loss, leaks, and lubrication problems before they develop into serious engine damage.
Prevents Excessive Engine Friction
Engine oil creates a protective layer between moving metal components, reducing direct contact as the engine runs.
If you know how to check oil level in car, you can ensure that enough lubricant is available to control friction, limit heat buildup, and protect internal parts from premature wear.
Identifies Oil Leaks Early
Small leaks may not leave a visible puddle beneath the vehicle, especially when oil escapes slowly or burns on hot engine surfaces.
Monitoring the dipstick regularly makes gradual oil loss easier to notice and allows seals, gaskets, or other damaged components to be inspected before the problem worsens.
Reduces the Risk of Overheating
Oil helps regulate engine temperature by carrying heat away from critical moving parts. When the level is too low, internal temperatures can rise quickly and place additional strain on the engine.
Maintaining the recommended amount supports effective cooling and reduces the risk of heat-related damage.
Helps Prevent Expensive Repairs
Driving with insufficient oil can damage bearings, pistons, camshafts, and other costly components.
Routine checks take only a few minutes but may prevent severe mechanical failure. Correcting a low reading early is far less expensive than rebuilding or replacing an engine after extensive internal damage.
Maintains Reliable Engine Performance
Proper oil levels allow the engine to operate smoothly, quietly, and efficiently. Low oil may lead to ticking noises, rough performance, reduced responsiveness, or increased fuel consumption.
If you manage to monitor regularly, you can detect unusual changes early and guarantee consistent performance between maintenance visits.
2. How to Check Engine Oil Level in Car With a Dipstick
Checking the engine oil takes only a few minutes, but the reading can be inaccurate when the vehicle is parked unevenly or the oil has not settled.
Follow the correct sequence below to measure the level clearly and avoid adding too much oil.
Step 1: Park on level ground
Move the vehicle to a flat surface so the oil remains evenly distributed in the oil pan and produces a reliable dipstick reading.
Step 2: Turn off the engine
Follow the owner’s manual regarding whether to check the oil cold or after warming the engine. When checking it warm, wait about five to ten minutes for the oil to drain back into the pan.
Step 3: Locate the dipstick
Open the hood and look for the dipstick handle, which is often yellow or orange. Consult the owner’s manual when its position is unclear.
Step 4: Remove and clean it
Pull the dipstick out completely, then wipe away all oil with a clean, lint-free cloth or paper towel.
Step 5: Reinsert the dipstick
Slide it fully back into the tube, pause briefly, and pull it out again without turning it upside down.
Step 6: Read the oil level
Anyone learning how to check oil level in car should confirm that the oil line sits between the minimum and maximum markings, ideally closer to the maximum mark.
Step 7: Inspect the oil condition
Look for unusual thickness, a milky appearance, metal particles, or a strong burnt smell, as these signs may indicate contamination or an internal problem.
Step 8: Add oil when necessary
Use the oil grade recommended by the manufacturer and add only a small amount at a time. Recheck the dipstick after each addition to prevent overfilling.
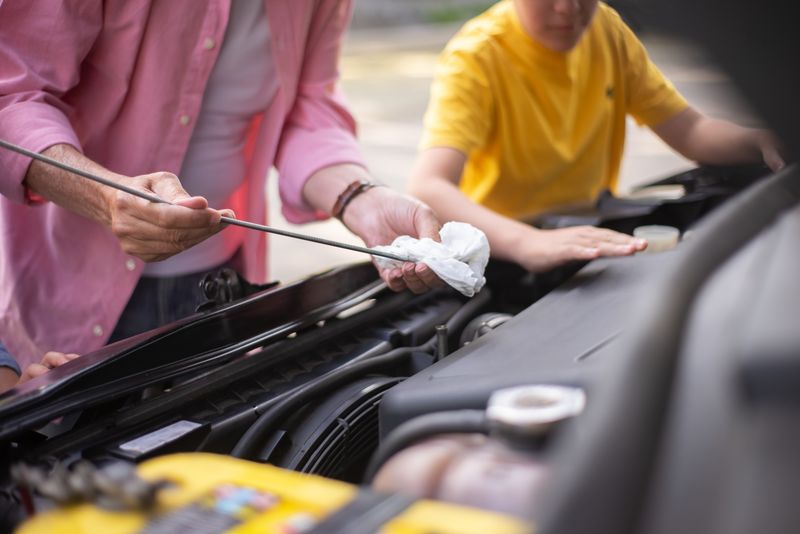
Using a dipstick to check oil level is a commonly used method. (Image by Pexels)
3. How to Check the Oil Level in Your Car Without a Dipstick
Many newer vehicles replace the traditional dipstick with an electronic oil-level monitoring system.
When learning how to check oil level in car, remember that the exact procedure varies by model, so always follow the instructions in your owner’s manual before relying on the displayed reading.
Step 1: Park on level ground
Place the vehicle on a flat surface to prevent oil from shifting inside the pan and affecting the electronic measurement.
Step 2: Bring the engine to the required temperature
Some vehicles require a cold engine, while others need the oil warmed to normal operating temperature. Follow the manufacturer’s instructions for an accurate result.
Step 3: Turn off the engine if required
Certain systems measure the level only after the engine has been switched off and the oil has had several minutes to settle.
Step 4: Switch on the ignition
Press the start button without starting the engine, or turn the key to the accessory position, depending on the vehicle.
Step 5: Open the vehicle settings
Use the dashboard controls, infotainment screen, or steering-wheel buttons to access the service, maintenance, or vehicle-status menu.
Step 6: Select the oil-level option
Choose “Engine Oil Level,” “Oil Measurement,” or a similar command. The system may take a few seconds or several minutes to complete the reading.
Step 7: Review the displayed result
Confirm whether the oil level is normal, low, above the recommended range, or temporarily unavailable. Some systems display a gauge, while others provide a written message.
Step 8: Add oil carefully when needed
Use the manufacturer-approved oil and pour in a small amount at a time. Allow the system to update before adding more, as overfilling can also harm the engine.
Step 9: Seek assistance if no reading appears
Messages such as “measurement unavailable” may result from incorrect vehicle position, engine temperature, or waiting time. Persistent errors should be inspected by a qualified technician.
4. How to Check Oil Level in Car on Dashboard
Dashboard oil readings provide a convenient way to monitor the engine without opening the hood, but the system must be used under the correct conditions.
Because menu names and measurement requirements vary by vehicle, consult the owner’s manual before interpreting the result.
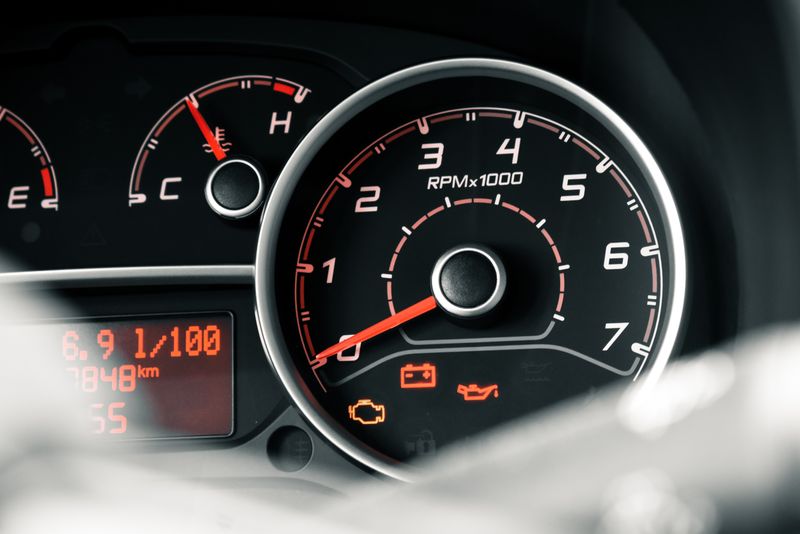
How to check oil level in car on dashboard? This method depends on each car. (Image by Pexels)
Step 1: Park on level ground
Position the vehicle on a flat surface so the electronic sensor can measure the oil level accurately.
Step 2: Prepare the engine correctly
Some cars require the engine to be warm, while others need it switched off for several minutes. Follow the manufacturer’s recommended procedure.
Step 3: Turn on the ignition
Start the vehicle or activate the ignition without starting the engine, depending on the dashboard system.
Step 4: Open the vehicle information menu
Use the steering-wheel controls, instrument-cluster buttons, or infotainment screen to access vehicle status, service, or maintenance settings.
Step 4: Select the engine oil option
Choose “Oil Level,” “Engine Oil Measurement,” or a similar menu item shown on the display.
Step 5: Wait for the measurement
Keep the vehicle stationary while the system checks the oil. The process may take several seconds or a few minutes.
Step 6: Read the displayed status
The dashboard may show a gauge, percentage, minimum and maximum range, or a message such as “Oil Level Correct” or “Add Oil.”
Step 7: Add oil carefully if required
Use the recommended oil type and add only a small amount at a time. Allow the system to update before adding more.
Step 8: Investigate warning messages
Persistent alerts, unavailable readings, or sudden changes may indicate a sensor fault, oil leak, or another engine-related issue that requires professional inspection.
5. Common Oil-Checking Mistakes That Distort the Reading
Even a simple oil check can produce misleading results when the vehicle, engine, or dipstick is handled incorrectly. Avoiding the following mistakes helps you obtain a more reliable reading and prevents unnecessary oil additions or missed maintenance concerns.
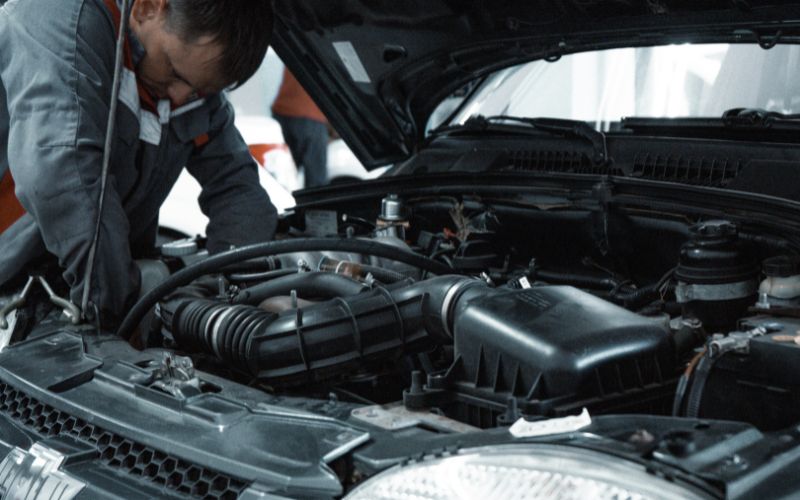
Avoid common oil-checking mistakes to get an accurate reading and keep your engine properly maintained. (Image by Unsplash)
Checking on Uneven Ground
Parking on a slope causes the oil to collect unevenly inside the oil pan, which can make the dipstick show a level that is higher or lower than the actual amount. Always move the vehicle to a flat, stable surface before beginning the inspection. Even a slight incline may affect the reading enough to create confusion, especially when the oil level is already close to the minimum or maximum mark.
Measuring Immediately After Turning Off the Engine
Oil continues circulating through the engine while it is running and needs time to drain back into the oil pan after the engine is switched off. When exploring how to check oil level in car, wait about five to ten minutes before pulling the dipstick unless the owner’s manual says otherwise. This allows the oil to settle and provides a more accurate reading.
Reading the Dipstick Without Cleaning It First
Oil can splash or smear along the dipstick tube while the engine is operating, leaving residue above the true level. Reading the dipstick immediately after removing it may therefore create a false result.
Pull it out, wipe it completely with a clean, lint-free cloth, reinsert it fully, and then remove it again. The second reading will display a clearer oil line between the minimum and maximum markings.
Failing to Insert the Dipstick Completely
When the dipstick is not pushed fully into its tube, the measuring end remains positioned higher than intended and may indicate that the engine has too little oil. Make sure it reaches its normal seated position before pulling it out for the final reading.
Bent dipsticks, blocked tubes, or incorrect replacement parts can also affect insertion depth, so investigate anything that prevents the dipstick from fitting smoothly.
Adding Too Much Oil After a Low Reading
Pouring in a large amount of oil at once can raise the level above the maximum mark and create problems such as foaming, increased pressure, leaks, or catalytic converter damage. Add only a small quantity, wait briefly, and measure again before continuing.
Use the manufacturer-recommended oil grade and never assume that the entire container is required. Gradual topping up provides better control and reduces the risk of overfilling.
6. Frequently Asked Questions About Checking a Car’s Oil Level
Correct timing and proper interpretation are essential for getting an accurate oil reading. If you’re learning how to check oil level in car correctly, the answers below clarify common concerns about engine temperature, waiting time, low oil, and overfilling.
Should the engine be hot or cold when checking the oil?
The correct condition depends on the vehicle manufacturer’s instructions. Some cars should be checked when cold, while others require the engine to be warm and then switched off briefly so the oil can settle.
How long should you wait before reading the dipstick?
Waiting about five to ten minutes after turning off a warm engine is usually enough for the oil to drain back into the pan. Checking too soon may produce a falsely low reading because some oil is still circulating through the engine.
What happens if the oil level is below the minimum mark?
Oil below the minimum mark may reduce lubrication and increase friction, heat, and wear inside the engine. Add the recommended oil gradually, recheck the level, and investigate possible leaks or excessive oil consumption if the problem returns.
Can too much engine oil damage a car?
Yes, overfilling can cause the crankshaft to churn the oil into foam, reducing its ability to lubricate moving parts. Excess oil may also increase internal pressure, damage seals, trigger smoke, or harm the catalytic converter.
7. Final Words
Regular oil checks can protect your engine from premature wear, overheating, and costly mechanical damage. Once you understand how to check oil level in car, you can identify low oil, overfilling, or unusual changes before they become serious.
TAG Mobile can help you stay connected while accessing maintenance guidance, contacting roadside support, or arranging professional vehicle service whenever assistance is needed. So don’t hesitate to explore more!
Share
TAG Blog
Stories, guides, and helpful updates for staying connected.