How to Transfer eSIM to New iPhone: A Seamless Guide
If you are searching for how to transfer eSIM to new iPhone, the good news is that Apple has made the process easier in recent iOS versions. In many cases, you can move your digital SIM during the initial device setup or directly through the Cellular settings menu. The transfer typically requires both devices to be nearby and connected to Wi-Fi, and carrier support is also important. Before starting, it’s a good idea to confirm that your current line is eligible for eSIM transfer.
For detailed step-by-step instructions and troubleshooting tips, you can refer to the full guide from TAG Mobile below to learn more.
1. How to Transfer eSIM to a New iPhone (Quick Steps)

If you are wondering how to transfer eSIM to new iPhone, Apple provides a built-in process that makes the switch simple and secure.
As long as both devices are compatible, updated, and connected to Wi-Fi, you can complete the transfer in just a few guided steps.
Turn On Your New iPhone
How to transfer eSIM from one iPhone to another? First, you need to power on your new iPhone and begin the standard setup process.
Make sure Bluetooth is enabled on your old iPhone, as the transfer relies on wireless communication between the two devices. Keeping both phones charged during the process helps avoid interruptions.
Place It Near Your Old iPhone
Next, place your new iPhone close to your current device. Your old iPhone will display a Quick Start prompt, asking if you want to set up the new device using your Apple ID. This proximity allows the phones to securely detect each other and prepare for data and eSIM transfer.
Follow the Quick Start Instructions
Follow the on-screen Quick Start instructions on both devices. Your new iPhone may display an animation that you scan with your old iPhone’s camera to establish a secure connection. During this process, the system prepares to move your existing settings, including eligible cellular plans.
Select Your Cellular Plan
When prompted, your new iPhone will show available cellular plans linked to your Apple ID. Select the eSIM plan you want to transfer. This step is essential in understanding how to transfer eSIM to new iPhone correctly, as you must confirm which specific line should move to the new device.
Confirm Transfer
Finally, confirm the transfer on both devices if requested. Your carrier may also send a verification message to approve the move.
Once the process completes, your new iPhone should display signal bars, indicating that the eSIM has been successfully activated and is ready for calls, texts, and mobile data.
>>> Read More: SIM Lock iPhone: 2026 Guide to Unlocking and Lifeline Benefits
2. Other Ways to Transfer eSIM to a New iPhone
If Quick Start is not available, there are alternative methods you can use to move your digital SIM. Understanding these options helps clarify how to transfer eSIM to new iPhone even when automatic transfer is not supported by your carrier.
Transfer from iPhone Settings
You can transfer your eSIM directly through the Settings menu on your new iPhone. Go to Settings → Cellular (or Mobile Data) → Add eSIM, then choose the option to transfer from a nearby iPhone if available. Both devices must have Bluetooth enabled and be signed in with the same Apple ID.
Your carrier may require confirmation before completing the move.
Once approved, the eSIM profile is securely transferred to the new device, and the previous phone will typically deactivate that line automatically. If you plan to reset your old phone afterward, you can select keep eSIM and erase data to retain the digital SIM while removing personal content.
Scan Carrier QR Code
If direct transfer is not supported, you can request a new activation QR code from your carrier. On your new iPhone, open Settings → Cellular → Add eSIM, then select the option to use a QR code.
Use the camera to scan the code provided by your carrier, or manually enter the activation details if required. After the profile downloads, confirm activation and wait for signal bars to appear. This method is commonly used when switching devices across different iOS versions or when carriers require manual reinstallation.
3. What to Check Before Transferring Your eSIM
Before you begin the transfer process, it’s important to confirm that your devices and carrier support eSIM migration. A quick review of the items below can help prevent activation delays or unexpected service interruptions.
- Confirm that your carrier allows eSIM transfers between devices. Some providers support automatic transfer, while others require issuing a new QR code or manual activation.
- Make sure both your old and new phones support eSIM functionality. The new device must also be unlocked or compatible with your current carrier’s network.
- Ensure both devices are updated to the latest software version. Newer system updates often improve eSIM transfer reliability and reduce setup errors.
- Keep both phones connected to Wi-Fi and turn on Bluetooth. The transfer process relies on a secure wireless connection between the devices.
- Verify that your current eSIM line is active and in good standing. If your account has restrictions or pending issues, the transfer may fail.
- Although eSIM transfer does not usually erase data, backing up your device through iCloud or your preferred method adds an extra layer of protection.
4. Upgrading Phones? Some Devices Come Ready With Service
When upgrading to a newer smartphone, it’s helpful to understand that eSIM technology is generally available only on newer-generation devices. Older phones typically depend on a removable physical SIM card, while modern models include embedded SIM hardware that allows fully digital activation.
This means faster setup, fewer physical components, and easier carrier switching without handling tiny SIM trays.
If affordability is a concern, the Lifeline Program may provide a practical path forward. This federal assistance program offers eligible low-income consumers free or discounted monthly wireless service, helping households maintain reliable communication for work, school, healthcare, and emergency needs.
Upgrading through a participating provider can combine both a newer device and essential service support.
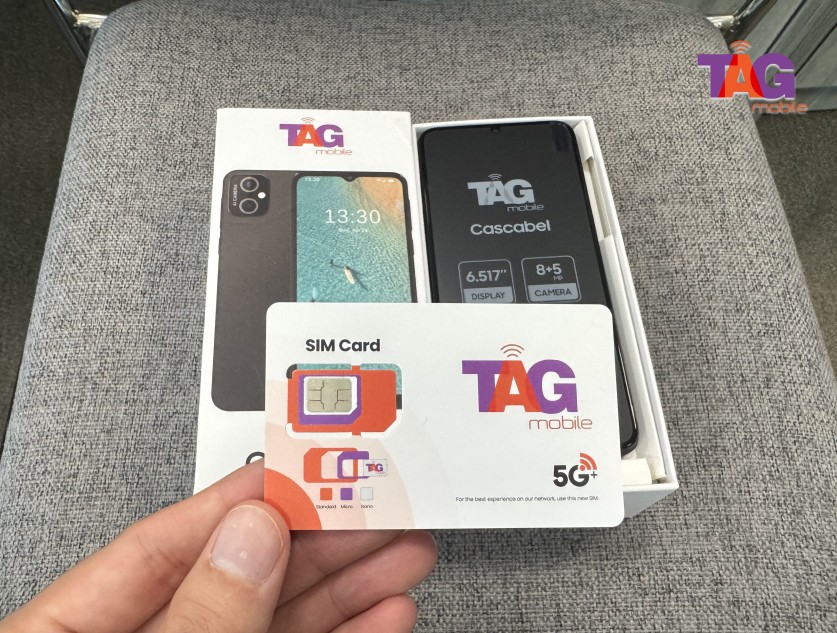
TAG Mobile supports both physical SIM cards and eSIM technology, giving customers flexible activation options depending on their device. When you apply and receive a compatible phone through TAG, your device may arrive with service already activated, including pre-configured eSIM on eligible models.
This streamlined setup reduces technical steps, eliminates the need for manual SIM installation, and allows you to power on your phone and start using it immediately.
5. Final Words
Knowing how to transfer eSIM to new iPhone can make the upgrade process far less stressful and much more efficient. With Apple’s built-in transfer options and carrier-supported digital activation, you can often move your mobile line without visiting a store or waiting for a replacement SIM card. Taking time to confirm compatibility, ensure both devices are updated, and keep Wi-Fi available will help prevent interruptions.
A smooth eSIM transfer means you can start using your new iPhone right away. If you need additional support or are looking for flexible eSIM plans, explore the options available at TAG Mobile to stay connected with ease.
Notice: The government does not cover device costs, only basic service through Lifeline. Any free or discounted devices, upgrades, or top-ups are limited-time TAG Mobile offers and may vary by state, eligibility, and availability. Terms and conditions apply.
- Share This:
-

-

-

-

-

About the author
