

How to Use a Meat Thermometer the Right Way for Perfect Results
Getting meat just right isn’t about guesswork. It’s about temperature. If you’ve ever cut into chicken hoping it’s done or ended up with dry, overcooked steak, you’re not alone. Learning how to use a meat thermometer takes that uncertainty out of the process and gives you consistent results every time.
Instead of relying on timing alone, a quick temperature check helps you cook with confidence. In this guide, you’ll learn how to use a meat thermometer the right way, from where to insert it and what to avoid, to when to check and how to read the results.
1. Why a Meat Thermometer Is Better Than Guessing
Color, texture, and cooking time can be misleading because meat may appear done before the center reaches a safe temperature. Using a thermometer replaces guesswork with a clear reading, helping you cook more safely and consistently.
- Improves food safety: Measuring the internal temperature helps confirm that harmful bacteria have been reduced to safer levels.
- Prevents overcooking: Accurate readings let you remove meat from the heat before it becomes dry, tough, or flavorless.
- Delivers consistent results: Knowing how to use a digital meat thermometer makes it easier to repeat the same doneness across different meals.
- Works with many meats: Thermometers can check poultry, beef, pork, lamb, fish, burgers, and reheated dishes.
- Reduces unnecessary cutting: You can check doneness without repeatedly slicing the meat and allowing valuable juices to escape.
2. How to Use a Meat Thermometer: The Full Guide
Correct placement matters just as much as the temperature reading itself. Learning how to use a meat thermometer with a consistent process helps you avoid bones, fat, and shallow spots that can produce misleading results and ensures a more accurate internal temperature.
Step 1: Choose the right thermometer
Use an instant-read thermometer for quick checks, or a leave-in probe for roasts, poultry, and longer cooking sessions.
Step 2: Insert it into the thickest part
Place the probe in the center of the meat, where heat takes the longest to reach.
Step 3: Avoid bones and fat
Keep the tip away from bones, gristle, and large pockets of fat, as these can give inaccurate readings.
Step 4: Check thin foods from the side
For burgers, chicken breasts, and chops, insert the probe horizontally so it reaches the center.
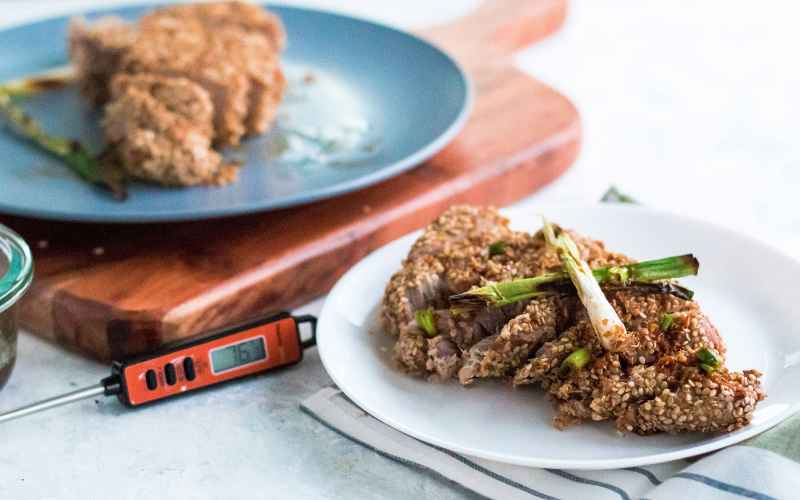
Step 5: Wait for a stable reading
Hold the thermometer in place until the temperature stops changing or the device signals it’s ready.
Step 6: Check more than one spot
For large or uneven cuts, test several areas and use the lowest safe reading.
Step 7: Account for carryover cooking
Remove meat slightly before it reaches the target temperature, as it may continue to rise while resting.
Step 8: Clean the probe after every use
Wash with hot, soapy water and dry thoroughly to prevent cross-contamination.
Step 9: Calibrate when needed
Test the thermometer occasionally using ice water or boiling water, following the manufacturer’s instructions.
>>> Also read: How to Clean a Coffee Grinder for Better-Tasting Coffee
3. Common Mistakes When Using a Meat Thermometer
Small placement and timing errors can make an accurate thermometer produce a misleading result. Avoiding these mistakes helps you judge doneness more reliably while protecting both food quality and safety.
Measuring Too Close to the Surface
Placing the probe near the outside measures an area that heats faster than the center. Insert it into the thickest part of the meat so the sensing tip reaches the coolest section. This is one of the most important steps when learning how to properly use a meat thermometer.
Touching Bone
Bone can conduct heat differently from the surrounding meat and may produce a falsely high reading. Position the probe beside the bone rather than against it. For large poultry or bone-in cuts, check more than one location to confirm the lowest internal temperature.
Checking Too Early
Repeatedly opening the oven or grill too soon can release heat and extend cooking time. Begin checking near the end of the estimated cooking period, then monitor more closely as the meat approaches its target temperature. Avoid relying on time alone because thickness and equipment vary.
Ignoring Carryover Cooking
Meat often continues to rise in temperature after it leaves the heat source. Failing to account for this can lead to dry, overcooked results. Rest larger cuts as directed, but still confirm that the final temperature reaches the appropriate safe level.
Using It to Take Your Temperature
Kitchen meat thermometers are not designed or approved for measuring human body temperature. Their shape, calibration range, and sanitation standards differ from those of medical thermometers.
Even if you know how to use a meat thermometer, always use a proper digital body thermometer for health checks and keep cooking tools separate to prevent contamination.
4. Can You Use a Meat Thermometer to Take Your Temperature?
Technically, a digital meat thermometer may detect an elevated temperature during an emergency, but it is not designed for medical use. When considering how to use a meat thermometer to take your temperature, remember that readings may be inaccurate because kitchen thermometers have different calibration ranges and response times.
Hygiene and safety are also important concerns. The probe may carry food bacteria, feel uncomfortable, or cause injury if inserted incorrectly. Use a proper medical thermometer whenever possible, and clean cooking tools separately.
5. Make Cooking Easier With Helpful Mobile Resources
Cooking gets easier when the right information is within reach. From quick checks on how to use a meat thermometer to step-by-step recipe videos, having a phone nearby means fewer guesses and better results.
For eligible households, that access may cost less than expected. The Lifeline Program is a federal benefit that helps reduce the monthly cost of phone or internet service for qualifying users, either based on income or participation in programs like SNAP or Medicaid.
Through Lifeline, providers like TAG Mobile may offer discounted wireless service and, in some cases, access to a free smartphone with talk, text, and data included. That means you can look up safe cooking temperatures, follow recipes in real time, set timers, or watch tutorials, right from your kitchen.
Depending on availability and eligibility in your area, some devices may include:
- iPhone 8 Plus: Features a large touchscreen for viewing recipes, watching cooking demonstrations, setting timers, and making video calls.
- Samsung Galaxy S21+ 5G: Supports fast connectivity and a spacious display for streaming tutorials, browsing temperature guides, and managing everyday applications.
- Samsung Galaxy A11: Includes a 6.4-inch screen and 4,000 mAh battery, providing useful space and power for recipes, messages, and online resources.
- TCL 20 XE: Offers a 6.5-inch display and a 5,000 mAh battery for watching step-by-step cooking guides and completing routine mobile tasks.
- FOXXD A67L: Provides practical smartphone access for searching recipes, checking cooking temperatures, communicating, and using helpful kitchen tools.
Models and offers vary by location and eligibility, so checking availability is the best way to see what’s currently offered.

Note: Eligibility varies by state and program. Offers depend on availability and qualifications. TAG Mobile operates under the federal Lifeline Program as an Eligible Telecommunications Carrier (ETC). Service is non-transferable and limited to one service per household.
6. Frequently Asked Questions
Using a meat thermometer correctly depends on placement, timing, and the type of thermometer you have. These answers cover the most common situations, so you can check doneness more accurately and cook with greater confidence.
How to use a meat thermometer for chicken?
Insert the probe into the thickest part of the chicken, avoiding bone, gristle, and the pan. For whole poultry, check the innermost part of the thigh and wing as well as the thickest part of the breast, making sure each area reaches a safe temperature.
Where should you insert a meat thermometer?
Place the probe in the thickest section of the meat where heat takes the longest to reach. Keep the sensing tip away from bone, large pockets of fat, and the cooking surface, and check more than one spot on large or irregular cuts.
Can you leave a meat thermometer in the oven?
Only oven-safe, leave-in thermometers or wired probe models should remain in the oven during cooking. Instant-read thermometers are designed for quick checks and may be damaged if left exposed to continuous high heat.
How do you know if your meat thermometer is accurate?
Test the thermometer in a glass of ice water, which should read about 32°F or 0°C after stabilizing. You can also use boiling water as a second check, though the expected reading changes slightly with elevation.
Final Words
Accurate temperature checks help protect food safety while preventing meat from becoming dry or overcooked. This guide to how to use a meat thermometer covers proper placement, stable readings, carryover cooking, calibration, and cleaning for more consistent results.
Keep recipes, temperature charts, cooking videos, and other useful kitchen resources within easy reach by exploring available device options through TAG Mobile.
- Share This:
-

-

-

-

-



About the author
